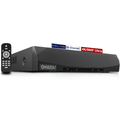
Connecting Surveillance Camera Systems to the Internet - A Guide by OHWOAI
Introduction
Setting up surveillance camera systems involves several critical steps, with connecting the monitoring host to the internet being a pivotal aspect. OHWOAI, a trusted name in surveillance solutions, provides a comprehensive guide on how to establish this vital connection. This guide offers insights into the equipment required, preliminary setup, and configuration steps for a seamless integration of surveillance systems with the internet.
Preparation and Equipment
Before delving into the process, it's essential to gather the necessary equipment:
- **ADSL Broadband:**
Ensure that your ADSL broadband is active and operational. Keep the ADSL internet username and password readily available.
- **Router Installation:**
Install a compatible router (such as TP-LINK 410) and connect it to your computer and the video recorder. Follow the router's instruction manual to configure settings. Set the router's internet connection to "Automatic," and verify that internet access is functional on your computer.
Setting Up the Video Recorder for IE Remote Monitoring
- **Network Check:**
Confirm that the video recorder's network connection is functional and that it operates smoothly.
- **Network Settings:**
Access the video recorder's settings interface. Navigate to "Network Settings" and select "Static IP." Modify the static IP to "192.168.1.110," the gateway to "192.168.1.1," and the subnet mask to "255.255.255.0."
- **IE Browser Configuration:**
Ensure that your IE browser is properly configured for remote access to the video recorder. Enable ActiveX controls and plugins as per the manufacturer's recommendations.
Access the video recorder's interface by entering "192.168.1.110" into the browser's address bar. Install any required plugins, and after installation, access the video stream. Adjust settings as necessary.
Router Configuration for Remote Monitoring
- **Router Access:**
Access your router's interface by entering "192.168.1.1" in your browser's address bar.
- **Port Forwarding:**
Set up port forwarding rules as shown in the manual for your router. Create rules to forward traffic to the video recorder's IP address.
- **DMZ Configuration:**
Configure the DMZ host by entering the video recorder's IP address ("192.168.1.110") and enabling the DMZ option.
- **Dynamic DNS Setup:**
Configure dynamic DNS (DDNS) using the provided dynamic domain name, username, and password. Enable DDNS and save the settings.
Conclusion
By following these step-by-step instructions, surveillance camera systems can be successfully connected to the internet, enabling remote monitoring. OHWOAI's expertise in surveillance solutions ensures that businesses and individuals can set up and optimize their surveillance systems for effective monitoring and enhanced security. With the increasing importance of remote monitoring, OHWOAI's guidance equips users with the knowledge and tools needed to connect their surveillance systems seamlessly to the internet, enhancing their surveillance capabilities and peace of mind.
Sample Block Quote
Nam tempus turpis at metus scelerisque placerat nulla deumantos sollicitudin delos felis. Pellentesque diam dolor an elementum et lobortis at mollis ut risus. Curabitur semper sagittis mino de condimentum.


